Happy New Year! I hope you all had a good break over the Christmas and holiday period. I know I haven’t posted much since last December but I was kind of burned out after the holiday. Somehow things move along a lot slower too when the kids are around during the school holidays. It’s like nothing gets done but so much needs to be done. After the mad rush of getting everything ready for them to go back to school, it’s finally time to sit down and think about what to do next!
I originally planned to write up a New resolutions post about how I am going to schedule my blog posts properly, and yes even bring back the translations requests section but then I suddenly realize that I have to start sewing for Chinese New Year which is 23 days away! Gulp…. I have to sew (at least) 2 cheongsams for my daughters, including drafting new patterns since they have grown so much since last year. And I have to sew for my little boy too! So due to the tight timeline, I have to jump right in and the first one I will tackle will be from this book.
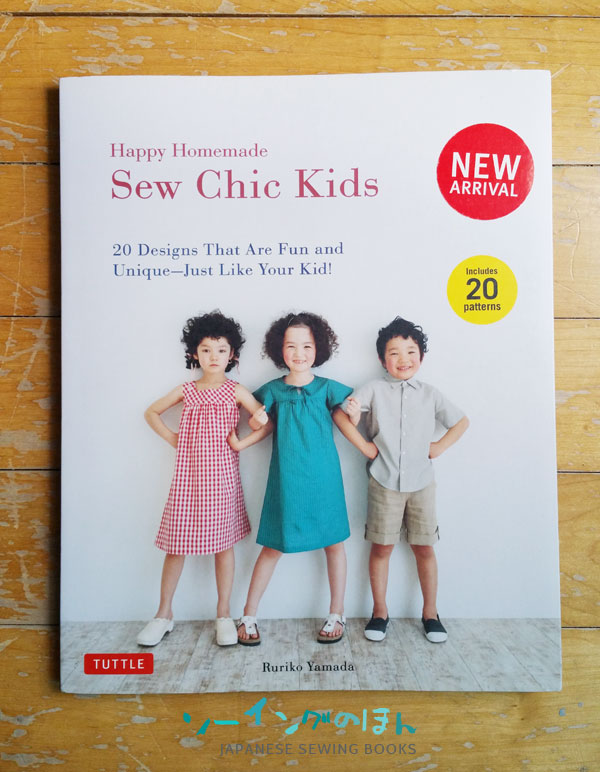
I have posted the full book review some time ago, so you can look at the rest of the projects here if you have not purchased the book yet. This book is translated into English so no worries about following along!

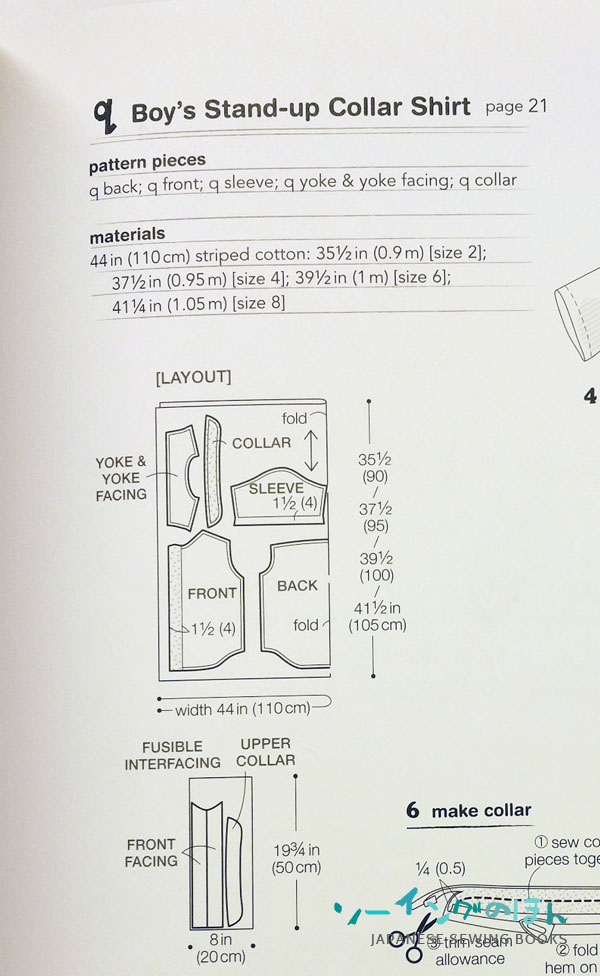
I will be making the above Boy’s Stand-up Collar Shirt in Size 2. I will be taking pictures as I go along, I’m not sure if I have space/time to setup my video equipment, since having a 2 year old around means no tripods stay upright for long. What am I talking about, he doesn’t even let me out of his sight. It is 6+ in the morning here which is why I can even type this out. Anyway, I’ll probably be taking pictures, so if you can, sew-along with me! I will be splitting up this project into a few separate posts, and the length of each post will literally depend on how much I get done each day.
So the first thing you have to do, as you can see on the bottom of the right hand page below, is to flip to pg 57. See below.
You will notice the instructions are rather scant. And you may wonder where the rest of the diagrams are? Why does it jump straight to number 6? The actual steps to follow are in the order given in the top right hand diagram. but notice the little footnote near number 7? It says to follow the steps in project “t” which is on pages 62-63, which is a normal collared shirt, with the exception of step 6 which is the making of the stand up collar.
I guess this is a good way of saving paper, since there is really no point printing repeated instructions. But I do wish that was written right under the materials list, and in a larger font. ;P
Anyway, gripes aside, and it wasn’t too hard to figure that out anyway, let’s move along and look at the pattern pieces and materials.
For materials, the length you will need is based on standard 110cm wide fabric. The lengths are listed in order of sizes. So for Size 2, I will need 35 1/2″ or 0.9m of fabric.
For pattern pieces, you will need to look for the pieces labelled “q” and you will need 5 pattern pieces (yoke and facing are the same pattern piece)

The pattern pieces are spread out over 3 different pattern sheets. I can only show you two since the are printed on double side, so I am just showing you how I located the pieces on sheet 1 and 3.
Pattern sheet 1 – Q – yoke and yoke facing (shown above)
Pattern sheet 2 – Q – sleeve (on reverse side of sheet 1)
Pattern sheet 3 – Q – back, collar (shown above)
Pattern sheet 4 – Q – front (on reverse side of sheet 3)
Now trace your patterns out, remember that there are no seam allowances, so you have to add them on after tracing.
To know how much seam allowance to add, refer to the Layout diagram.
For example, the pattern labelled SLEEVE has a double line around it, and at the bottom edge of the sleeve it says 1 1/2 (4)
This means, that there is a 3/8″ or 1cm seam allowance all around, except for the bottom edge where you should add on 1 1/2″ or 4cm of seam allowance.
For other pieces where there are no numbers and just a double line, it just means add on 3/8″ or 1cm seam allowance by default. Here are examples of two of the pieces with added seam allowances.

With the pattern pieces cut out, you can now cut them out of fabric. You can mix and match coordinating fabrics for the yoke / yoke facing, inner and outer collars, etc. Go ahead and be creative!

Here are my pattern pieces laid out on my fabric. I am using Sarah Jane’s Painted Gingham in blue. Note that I will have to cut two of the collar and two of the yoke pieces. Also, my layout is a little different from the one in the book. That is because the collar and yoke pieces have to be cut on fold, and furthermore the design in the book was using a striped fabric. So to mix things up a little the collar and yoke for the shirt in the book was running perpendicular to the rest of the shirt. So bear that in mind when you place your pattern pieces, it really depends on the print on your fabric and how you want it to appear on the shirt.
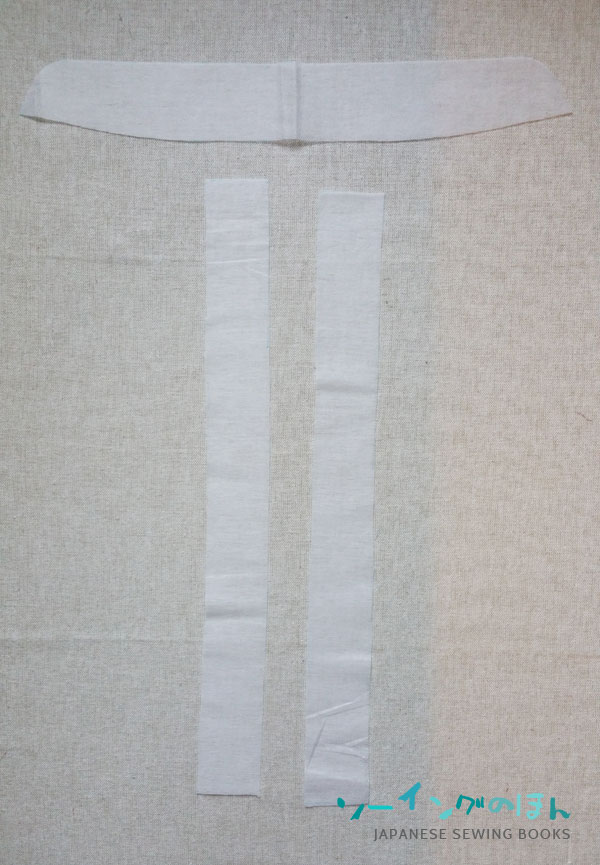
Next, you have to cut out the pieces for the Interfacing as well. Under the LAYOUT diagram, there is one more cutting diagram for FUSIBLE INTERFACING. The instructions for the FRONT FACING section are not very clear, and you may be confused over the “shape” of the front facing. Basically there are 2 x 4cm wide strips, meant to go onto the extended seam allowance of both Front pieces, which folds back to create the button placket. This interfacing will help to stabilize your button holes and buttons.
So now you should have all your pieces ready and let’s start sewing tomorrow! I will start with some prep work and then probably steps 1-3. Crossing my fingers I can stay on schedule 🙂 If you have any questions, ask them in the comments section below.
Updated : Post for Day 2 of sew-along, with a sewing video for steps 1-3 is now available.
[…] in the last post – we traced the pattern pieces and got the fabric and interfacing cut out. Today we start […]
Can you recommend me happened sewing books which has patterns for boys please 🙂 I would love to use to guide to understand Japanese books.. but first I need to find some with boys patterns.. can you help me with the titles ?