Did you know I’m back to accepting translation requests? Today’s translation request is from Michelle, who wanted to whip up a whole lot of these pretty tiered skirts for her little girl.

This skirt is from the book that I reviewed 3 yrs ago. There is a new book out by the same author and I will be reviewing it soon!
Title : 作ってあげたい、女の子の洋服
ISBN No : 978-4-529-05296-2
Author : 美濃羽まゆみ Minohane Mayumi
Publisher : Nihon-Vogue
I recently (and finally!) made the relax dress in the book that I wanted to make for so long. You might have seen it in my instagram feed.
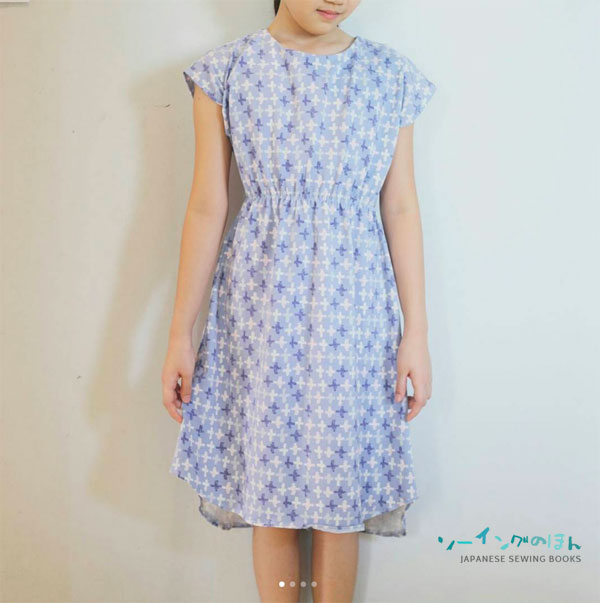
Sorry to digress. This is not what I’m translating today, but the tiered skirt (see first picture)
The pattern to be translated is found on pages 68-69. Those of you who have this book may find it useful. To save time, I typed out the instructions instead of overlaying it on the pattern itself. I followed the order of the text in the book and translated the text but omit typing out the numbers, so if there are any unclear parts, please leave me a comment below. Text in blue are my own personal notes.

Pettiskirt p8
Tiered skirt pg 24
(Top right) Suggested fabrics – Lawm, Thin cotton linen, Broadcloth, Thin linen, Sheeting
Finished dimension (in order of 90/100/110/120/130 sizes)
Length of skirt 28/31/33/36/39cm)
Materials (refer to book)
<Tiered skirt>
Liberty print Peacock Feather 110cm wide
1.2cm diameter buttons x 3
<Pettiskirt>
Scallop lace fabric 110cm wide
Your choice of accessories x 1
1.5cm wide elastic band (adjust to actual waist)
Cutting layout diagram
Tiered Skirt / Liberty Print
Yoke (2pc)
Skirt (2 pc)
Cut skirt pieces on fold (designated by the わ)
Use the according dimensions for the size you are using, and add on the seam allowance stated in brackets. If there is no stated seam allowance, the default is 1 cm.
For example, the size 110cm will be the 3rd number from the left.
For the yoke,
you will cut 34cm wide + 2cm side seam allowances = 36cm wide in total
The height of the yoke will be 10cm + 3.5cm top allowance + 1cm bottom allowance = 14.5cm in total
Order of sewing
1. Cut fabric according to diagram
2. Sew sides of skirt together, sew up the hem
3. Sew sides of yoke together, sew the waistband casing
4. Sew skirt and yoke together
5. Insert elastic band through waistband casing, and attach buttons to yoke.
Text on Detailed diagrams
Diagram 2 Sew sides of skirt together, sew up the hem
1. With the 2 pcs of skirt fabric right sides facing, sew the side seams.
2. Zig-zag/serge the seam allowances together, press towards the back of the skirt
3. Divide top edge of skirt into 8 equal parts and make markings.
4. Use a long stitch and sew two parallel lines on the top edge for gathering
5. (This was labeled 4 in the diagram as well but I think it’s just a typo error) Fold up the bottom edge twice (first the raw edge by 1cm, then 2.5cm) and sew 0.2cm from the top folded edge to finish the hem.

Diagram 3 Sew sides of yoke together, sew the waistband casing
- With the 2 pcs of yoke right sides facing, sew the side seams. (Leaving a gap for the elastic band on one side (see diagram)
- Zig-zag/serge the seam allowances together and press towards the back
- Divide the bottom edge of the yoke into 8 equal parts and make markings
- (this was labeled as 3) Cut into the seam allowance just and open up the seam allowance for the waistband casing
- (this was labeled as 4) Stitch 0.5cm around the edge of the opening for the waistband.
- (this was labeled as 5) Fold down the top edge twice, first by 1cm and then 2.5cm,
Diagram 4 Sew skirt and yoke together
- With the skirt and yoke right sides facing (top edge of skirt with gathers to bottom edge of yoke), sew together. (Refer to gathering method on page 39)
- Zig zag/serge seam allowances together and press towards yoke side.
Diagram 5 Insert elastic band through waistband casing, and attach buttons to yoke.
- Insert elastic band through casing. (zoomed in diagram – overlapt ends by 1cm and sew a Z across to secure)
- Sew on buttons
The second half of page 2 is for the pettiskirt.
The process is the same except for how you cut the fabric due to the scalloped border
Cutting layout
<Pettiskirt / scallop lace fabric>
Top piece is for yoke, bottom piece is for skirt to be cut along scalloped lace edge.
notes below layout diagram
*numbers in bracket indicate seam allowance. If not specified,the default is 1cm.
*Dimensions in order from left (top) sizes 90/100/110/120/130
Sewing order
- Cut the fabric according to the cutting layout diagram
- Sew the two sides of the skirt
(zoomed in diagram – press side seams to the back and stitch 3cm from the bottom to keep in place) - Sew the two sides of the yoke and finish the waistband casing
- Sew skirt and yoke together
- Insert elastic band through waistband casing. Attach decorations on yoke.
(zoomed in diagram – attach decoration 2cm from top edge)