Browsing Category

Back to School Sewing Patterns

Back to School Sewing Patterns Book Reviews Japanese Sewing Magazines Kids Sewing Patterns

The Last Cucito Magazine

March 28, 2015

Last September, I bought this magazine – Cucito Fall 2014. It was lying on my desk with a pile of other Japanese sewing books for review and when I came to it, I thought it was quite late into the Fall season to review this. There were patterns for Halloween which was over by that time. The clothes were also more suitable for fall than winter. So I left it out, not knowing it will be the last of the series! …. .·´¯`(>▂<)´¯`·.

cucitofall2014_1

Ever since I started sewing, I started buying sewing magazines as they are obviously great value for money. There are patterns for clothes and accessories from Baby size – Kids. The previous incarnation of Children’s sewing magazine by Boutique-sha was this one – Kodomo Boutique (where kodomo means Children in Japanese)

cucitofall2014_

This was the oldest magazine I could find in my collection. Released in May 2007. Look at that price! (That’s about 8USD) These magazines are more than half the price of regular sewing books, but contain more than double the patterns. This is because as a magazine they have loads of advertising, with sponsored projects by fabric companies/stores, as well as sewing machine companies. Kodomo magazine contained only kids patterns. Patterns for boys and girls, babies, as well as kids accessories like bags and crafts.  There were not many step by step photos, and seem to cater to an audience of mothers who are more advanced in sewing since there were not many beginner instructions.

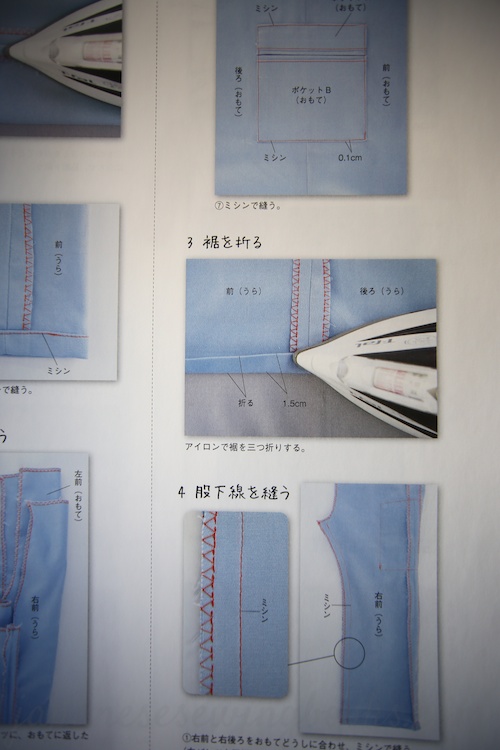
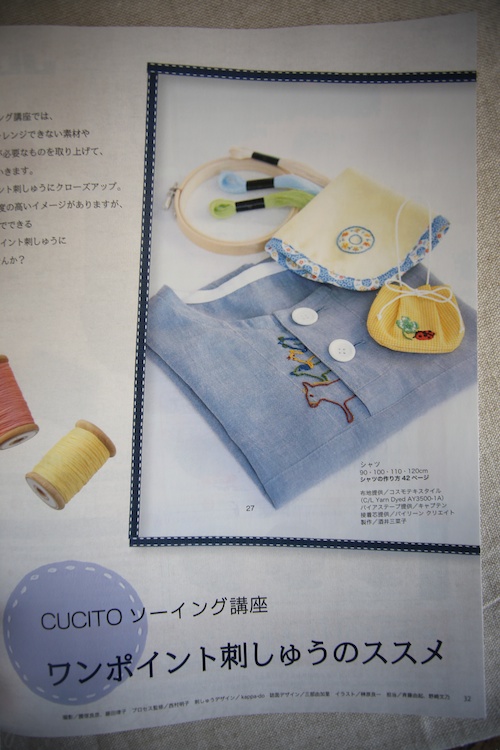
Cucito was the successor to this magazine and it was more beginner friendly, at least in my opinion… There were also matching patterns for Mums and kids, as well as more sewing lessons with step by step instructions. Unfortunately, Cucito seems to have run its course. On the publisher’s website, it states that the last issue of Cucito will be the 2014 Fall edition. It goes on to mention that they have been publishing Children’s sewing magazines, starting from Kodomo boutique since 1974! That’s a whopping 40 years!

Let’s look at a few pictures from the last issue and see what you will be missing…

cucitofall2014_2

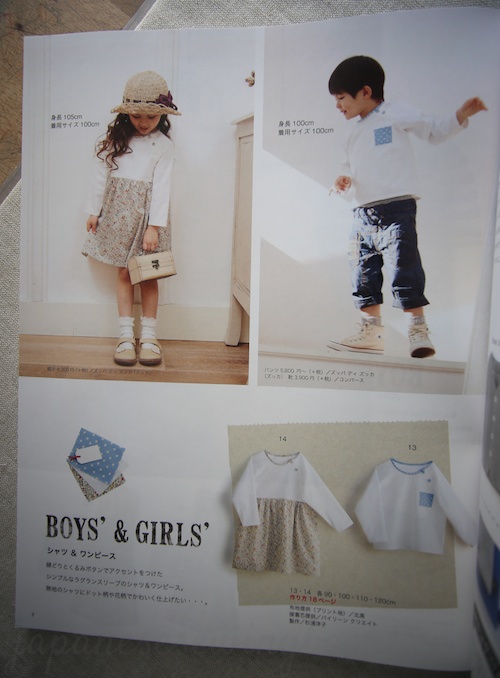
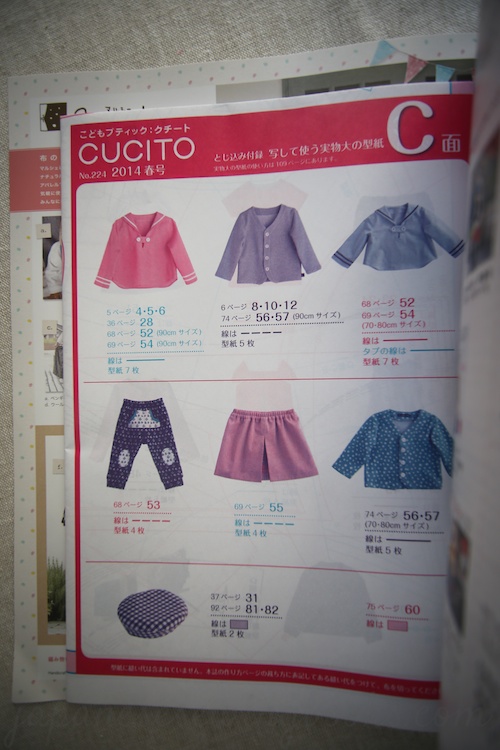
A whole bunch of patterns. From tops, to bottoms and accessories. For both girls and boys and some for Mums too.

cucitofall2014_3

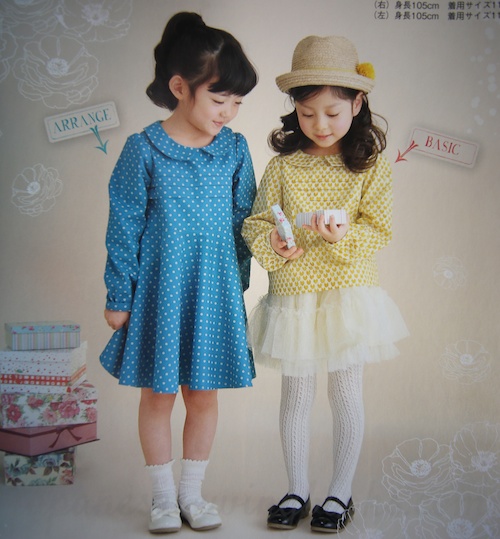
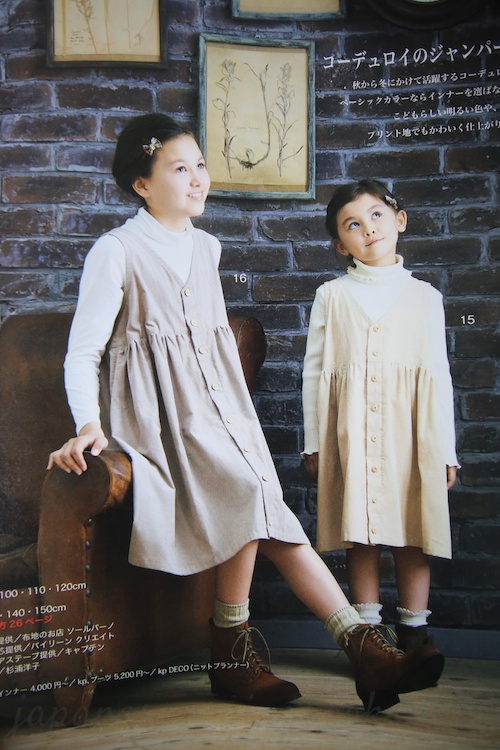
Matching tunics for Mum and Daughter

cucitofall2014_4

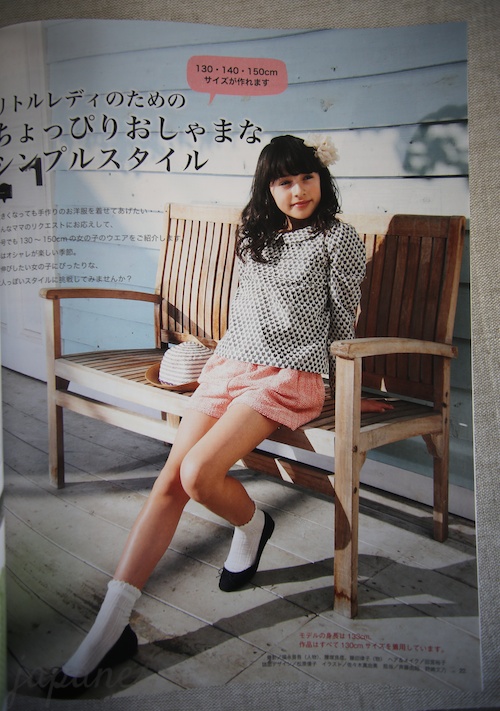
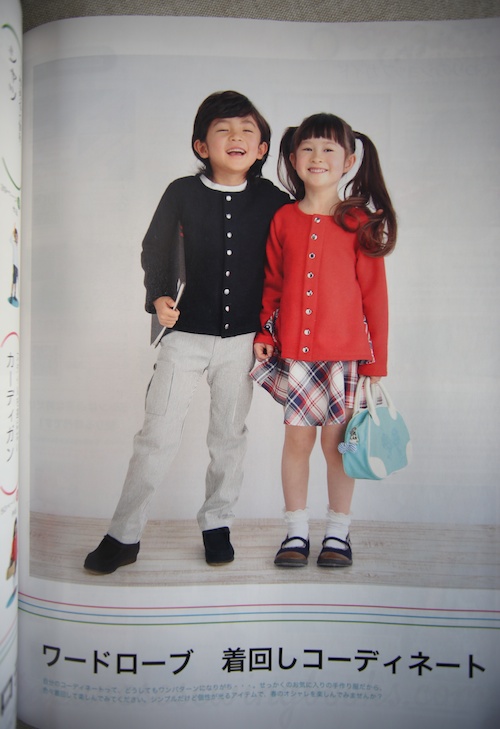
Recent issues of Cucito have also featured patterns for the in-between age group of Tweens. i.e. 130-150cm.

cucitofall2014_5

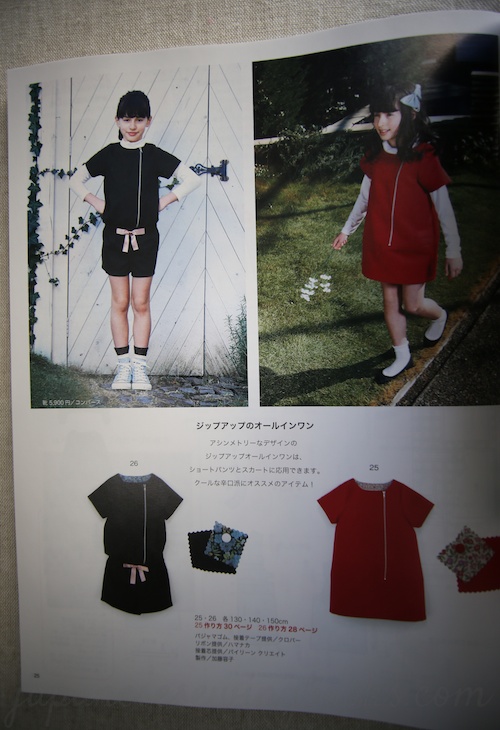
Another kid-tween pattern.

cucitofall2014_6

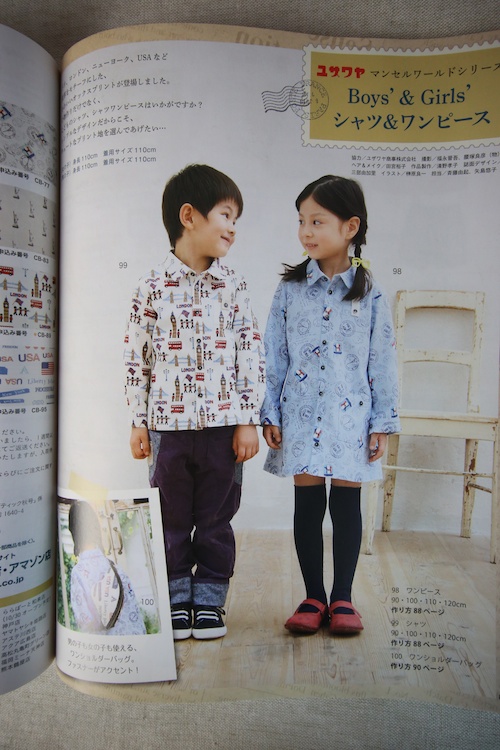
Boys and girls patterns, featuring the latest fabric range.

cucitofall2014_7

Mickey and Minnie costumes for Halloween, or just that outing to the Happiest place on Earth 🙂
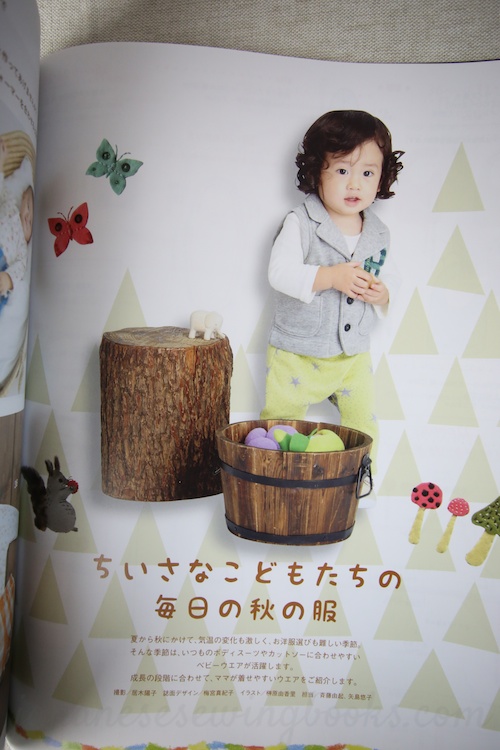
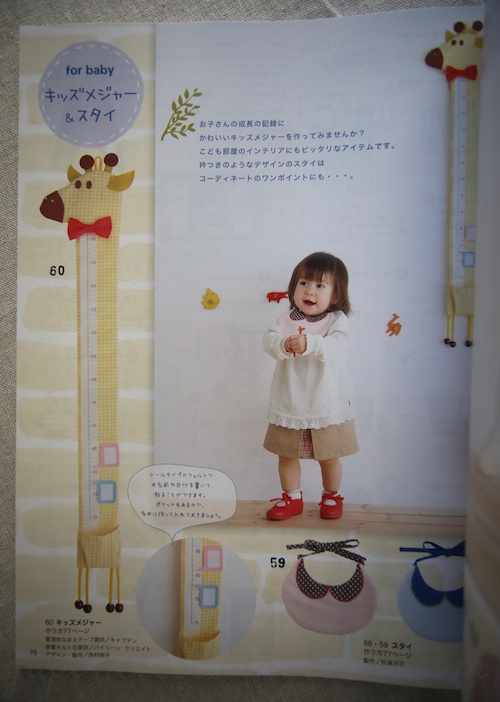
cucitofall2014_8

Babies patterns

cucitofall2014_9

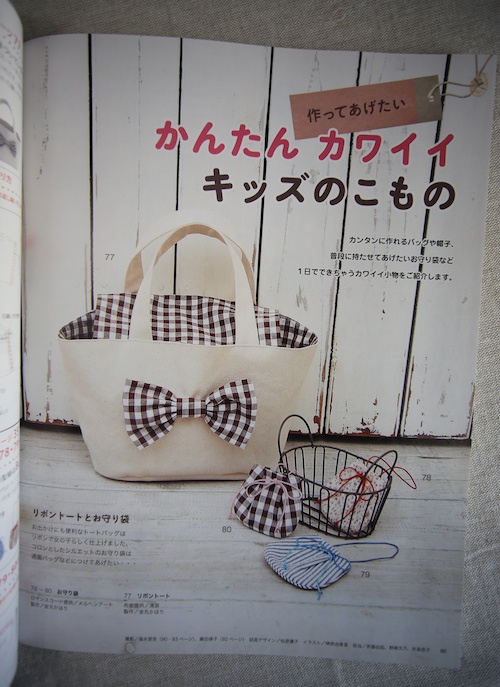
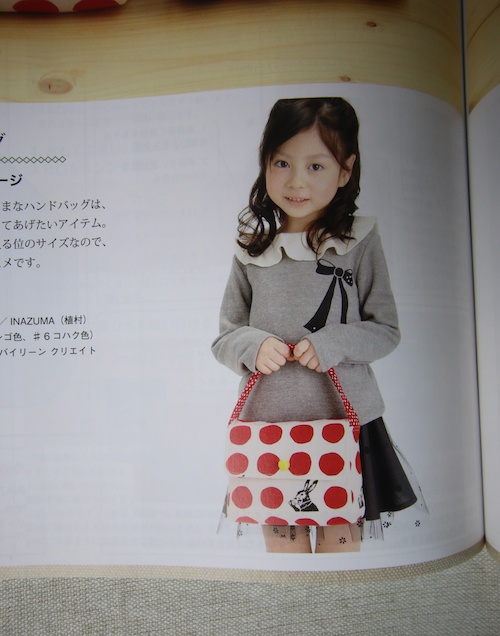
Kids accessories, like bags…

cucitofall2014_10

cucitofall2014_11 cucitofall2014_12

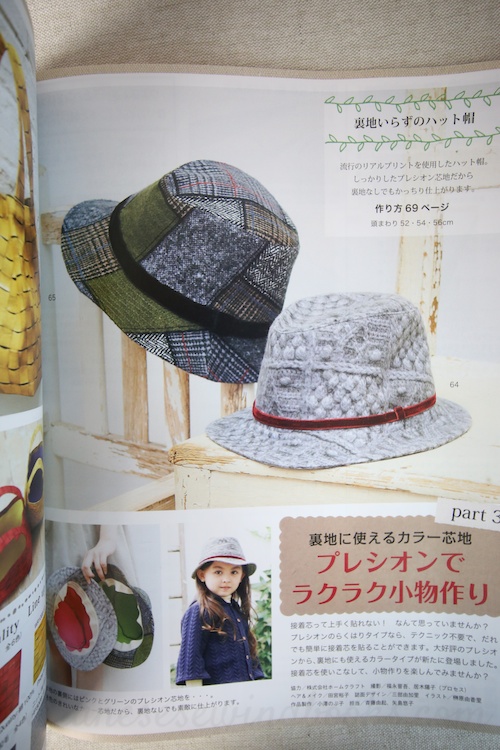
and hats (that’s a faux wool print fabric by the way!)

Instead of a standard format magazine released every season, the publisher says that they will be publishing 5 magazines in different formats and content to update it to today’s sewing needs. So do look out for those as well. I have already reviewed the first one, Cotton Friend Kids. Pricing wise, it is more expensive than the original magazine, at 972 yen compared to 880 yen for Cucito magazine. I won’t be reviewing the Handmade school accessories book because I have way too many school accessories books lying around and they are really mostly the same patterns.

「コットンフレンドキッズ!」
Cotton Friend Kids (Read my review)
published 28 Oct 2014
「年中使える 手作りの通園通学グッズ」
Handmade School Accessories
you can use all year round
published 28 Nov 2014
「ハンドメイドのかんたん子ども服2015夏」
Easy Handmade Clothes Clothes for Children
2015 Summer
To be released 23 Apr 2015
「コットンフレンドキッズ!2」
Cotton Friend Kids 2
To be released 19 May 2015
「秋冬のかんたんこども服」(仮題)
Easy Fall/Winter Clothes for Children (working title)
To be released late Aug 2015

Back to School Sewing Patterns Book Reviews Japanese Sewing Magazines Kids Sewing Patterns

Magazine Review – Cucito Spring 2014

May 5, 2014

Today we are going to take a look at the Spring Issue of Cucito  2014. This issue will satisfy anyone who loves sailor suits. Especially adorable on children!

cucitospring2014_1
cucitospring2014_3

The sailor tops come in boys, girls and even an adult version for Mom! (in S,M,L sizes)

There are also patterns for bottoms that will go well with the sailor blouse.

cucitospring2014_4

Skirts for the girls,

cucitospring2014_6

Pants for the boys.

cucitospring2014_5

There is a detailed step by step sewing lesson for the making of the pants, which is a simple elastic waistband pants with side pockets.

cucitospring2014_13

In this issue’s regular feature for older girls (130-150cm), there are some pretty spring blouses, tweed shorts,

cucitospring2014_8

and a versatile Zip up all-in-one pattern which comes in two different variations. The dress variation (red) and the one-piece shorts romper (in black)

cucitospring2014_7

There is also a special occasion formal dress segment for girls.

cucitospring2014_11

More casual wear – The blouse on the left is actually similar to the blouse made in the older girls section, and the dress on the left is a variation of the same pattern. That fabric on the right is so familiar, I’ve actually seen it at Spotlight. It is a Japanese cotton lawn that costs about $18/m (approx USD14.4/m). It’s scary how expensive fabric is here.

cucitospring2014_12

More pants for the boys, I wanted to show you this one because I really like the details on the short version – cuffed hem, box pleat pockets and button details.

cucitospring2014_14

cucitospring2014_20

And now, some projects for the babies. More sailor suits. The pants are so cute! 🙂

cucitospring2014_22

cucitospring2014_18

For the girls, the outfit comes with a skirt that has a front pleat and contrast lining. This skirt pattern comes with full color step by step photographs.

cucitospring2014_21

Other than clothing projects, there are also patterns for accessories, like this fabric growth chart shaped in a giraffe.

cucitospring2014_17

cucitospring2014_9

There is also a special feature for embroidery. A 5 page full color special with step by step photos on the different stitches, techniques and patterns you will need to personalize your sewing creations.

cucitospring2014_15

Ideas for using fabric scraps – making hair accessories.

cucitospring2014_16

Easy and cute stuff to make for kids.

cucitospring2014_2

 2 actual size pattern sheets included.

Title : Cucito Spring 2014
Publisher : Boutique-Sha

Back to School Sewing Patterns Free Patterns Sew-along Sewing Tutorials Sewing Videos

Simple wallet sewing video tutorial with free pattern – Sew-along Day #2

February 19, 2014

Welcome to Day#2 of our sewing video tutorial. Do you have all your materials ready? Let’s start!

To begin with, please refer to the layout diagram below, for the positioning of the different parts of the wallet. You will need to mark the position of the velcro strips on the outer and inner fabrics. Note the orientation of the inner (on top) and outer fabric (below). This is because the two pieces will be sewn with their wrong sides facing.

layout_sm


Layout and positioning of pockets and velcro. Click on image to zoom in.

How to make

Preparation
– Apply fusible interfacing (if you are not using laminates or thick fabrics)

  1. Make coin compartment – Sew front piece of coin compartment to the bottom edge of the zip. Sew backing piece for coin compartment to the top edge of the zip. Open up the two fabric pieces so that right sides are facing up. Topstitch the fabric onto the zip. Foldover the backing piece so that the short edges are aligned. Set aside.
  2. Make ID holder – Clip the two strips of bias in place to the longer sides of the plastic sheet. Sew down one side, with the bias sandwiching the plastic sheet. Set aside.
  3. Assembling the inner fabric piece. Place coin compartment, right sides aligned (as referred to in top diagram), clip in place. Baste the coin compartment to the inner fabric on the right and left sides, with a 0.5cm seam allowance. Next, place the plastic sheet 1cm away from the coin compartment, clip in place to the inner fabric. Sew the other side of the bias (the side that has not been sewn) so that the bias sandwiching the plastic sheet is sewn down to the inner fabric all in one stitch.
  4. Position Velcro pieces – using the layout diagram above, mark with a washable fabric marker/chalk, the velcro hook and loop tape positions  respectively on the outer and inner fabric pieces. Sew the velcro pieces on.
  5. Attach labels (optional step)
  6. Finish top edge of inner fabric – using the cotton twill tape, cover the edge of the inner fabric and sew down with a 0.7-0.8cm seam allowance.
  7. Assembling the wallet – Place outer fabric with right sides facing down (note orientation of velcro), place billfold lining fabric on top (wrong sides of fabric facing each other), and stack the inner fabric with the sewn on ID holder and coin compartment on top of it. Align the bottom edge of all pieces (the bottom edge is the one nearest to you).
  8. Important! Check the position of the velcro strips. Now fold up the wallet to check the orientation of the velcro. If it is correct, sew a 0.5cm seam allowance basting stitch around all 4 sides to hold all the layers in place.
  9. Finish – Using the cotton twill tape, sew all around the raw edges of the wallet, making sure to sew through all the layers.

I feel a headache reading what I just wrote 😛 It’s hard to imagine orientation and right sides and wrong sides without actually seeing it! So please watch the video, it will make things so much clearer. If you have a fast internet connection, watch in HD!

I hope you enjoyed this quick and easy sewing video tutorial. Even if you did not sew along, bookmark the page for you might want to make this one day. Happy sewing and stay tuned for my next sewing video tutorial next month. I will be sewing using a pattern from one of my Japanese sewing books!

Back to School Sewing Patterns Free Patterns Sew-along Sewing Tutorials Sewing Videos

Simple wallet sewing video tutorial with free pattern – Sew-along Day #1

February 17, 2014

This month’s sew-along, or rather, sewing tutorial, is a simple wallet that I made for my girl to carry to school. As she is only in primary school, she only needs to carry some loose change, a couple of bills occasionally, as well as a single student ID card.  So this is a very simple, minimalistic wallet, which I thought will be great for traveling as well.  There is one zipped coin compartment, one ID card holder, as well as an additional card slot (behind the coin compartment). Both card slots are sized to fit a standard credit card size, but in actual fact there’s enough room for a few cards in both slots.

wallet

I am using naniIRO’s Field STAR Hooray_やっほー  laminated cotton. Isn’t it lovely? I bought it last June during my trip to the nani IRO atelier. I wasn’t looking for laminates in particular but there it was, standing against the wall in the corner, calling out my name ;P  I have been keeping it aside to make a bag of my own, but since it was so precious I was always afraid of sewing with it and possibly ruining it! This is a small little project which only requires a little bit of fabric so I mustered up the courage to cut! and I’m so glad I did. 🙂

walletdiagram

It is really a very simple wallet and quick to sew, so there will only be two posts on this sew-along. Today is all about the materials, and I will post the pattern, or rather, the layout diagram, sewing video and how-to-make on Wednesday. This is so that you can have some time to get your materials ready. Please read my notes below with regards to the materials. Making a wallet usually requires interfacing but due to my choices of fabric I did not have to use any. So do prepare some medium/heavy weight interfacing to give your wallet some structure if you are using light/medium weight fabrics.

Materials

materials_1

materials_2

materials_3

About the materials

Outer fabric
I am using laminated cotton fabric, which is great because it can stand up to dirt and stains. It is also quite stiff and sturdy thanks to the laminated layer. If you are using normal cotton fabric, you can use normal fabric reinforced with medium-heavy weight fusible interfacing. There are also iron on vinyls like those from Heat ‘n’ Bond if you have a favorite print you want to use that does not come in laminate options.

Billfold lining
I used an upholstery weight fabric (for cushions and curtains) for this, so I didn’t need to add interfacing. If your fabric is light weight or medium weight it will be a good idea to reinforce this layer with interfacing.

Plastic Sheet
The plastic sheet was actually salvaged from the plastic cover of an old diary. It is slightly frosted which is great because I find that glossy plastic tends to be sticky and sometimes printed cards will get stuck and leave marks on the plastic piece as well. Look around you for something you can recycle, like an old clear plastic file or old book covers. You can even use vinyl sheets (available in some fabric stores), although I must say that cards tend to stick to vinyl.

Cotton Twill Tape
These tapes come in both polyester and cotton options. Both are fine, but try to get one that is not so thick. I found mine a little too thick for my machine to handle, especially around the folds and overlapping bits, I had to manually maneuver my stitches over the thick areas.

Zip
In the list of materials I mentioned a 12cm zip. I chose a metal zip that was slightly longer because the metal zip stoppers on both ends would have made it difficult for me to sew the twill tape over. So I chose to use a slightly longer zip and cut off the excess.

Ok, time to go shopping for your materials! If you have them ready, move on to the next post for the tutorial – Simple wallet sewing video tutorial with free pattern –  Sew-along Day #2


Back to School Sewing Patterns Free Patterns Sew-along Sewing Tutorials Sewing Videos

Free Pattern, Tutorial and Sewing Video – Cross back apron for adult and kids

January 29, 2013

The final post fo Back to School sewing month, as promised, will be a free sewing tutorial + patterns + video. The project I have chosen is a cross back apron!

Continue Reading