
It’s been a long while since I have posted a bag tutorial! Today I am posting a new reversible bag tutorial for the cube tote bag that I made for the Le Depart by Koizumi fabric Giveaway a few months ago.
This is the first bag I made. I call it the cube bag because it’s actually in a shape of a cube! If you read the previous post, you will know that I was inspired by a video by Diy Soho I saw online, about making a bag in this shape. However, the instructions were for drafting only, and there was no instructions on how to actually make the bag. So with due credit to the original designer, I am only sharing the size I made here. If you want to custom your own bag size, please refer to the original video (link to the tutorial here)

It’s really roomy and easy to make, and I actually do use this everyday because it’s so easy to find my stuff in it.

The finished dimensions of this bag is 25cm x 25cm x 25cm (when standing upright as a cube)
When the top is closed the width becomes 50cm wide, and the base is still a 25x25cm square.
Template
Download the
Free Reversible Cube Bag Tutorial (5863 downloads)
Materials List
Fabric A (Cotton + Steel Poolside Towels Blue) – 55cm x 45cm
Fabric B – (Navy blue soft canvas) 55cm x 45cm
Fabric C (Cotton + Steel Poolside Palms Canvas Pink) – 110cm (W) x 45cm (H)
Medium weight interfacing / Fusible fleece interfacing -110cm (W) x 45cm (H)
depending on how slouchy or stiff you want your bag to be.
2 Leather straps – 1cm wide by 50cm length x 2pcs
I used Fabric A and B as contrasting panels on the outer bag, and Fabric C referred to as Lining in the tutorial. But as it is a reversible bag, you can always flip the inside out and have the cute Poolside Palms fabric out. So just mix and match anyway you wish.
Preparation
- First you will need a template (click here to download) The pattern is spread over two pieces of paper so just trim off the excess on the bottom of page 1 and match and stick page 2 on top of it
- Lay the pattern on the fold, and cut the following pieces
2 pieces of Fabric A, 2 pieces of Fabric B, 4 pieces of Fabric C, 4 pieces of medium weight interfacing. - Apply interfacing to the outer pieces (in my case i applied it on Fabric A and Fabric B because they were softer and needed more structure.Then it’s time to sew! Follow the sewing video tutorial below.ETA : I went back to Youtube to check that the link to the drafting video works, and was shown a suggested link to the making video by the same designer that showed you how to make it! I must have missed it the first time or I wouldn’t have spent time making my own video. In any case, I already made the video, so I’ll just put it up and you can choose to view either one to learn how to make it. Watch the version by Diy Soho here, or watch mine below. It’s up to you.
and here are some pictures of the final bag!
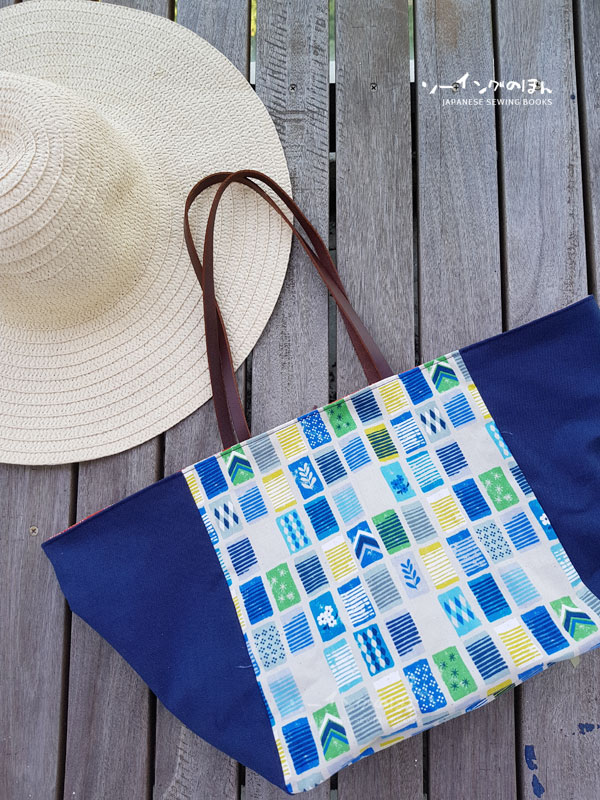

The base of the bag.
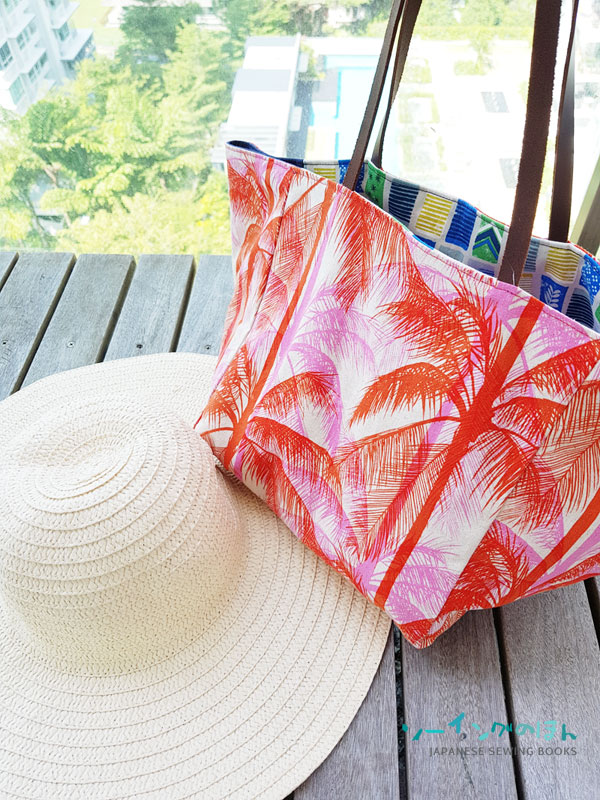
and the reverse side. All ready for the beach!


No Comments