All Posts By

Japanese Sewing Books

Free Patterns Guides Ladies Sewing Patterns Porcupine Patterns Sewing Tutorials

Hacking the Ladies Qipao to a 2 piece set

January 3, 2023

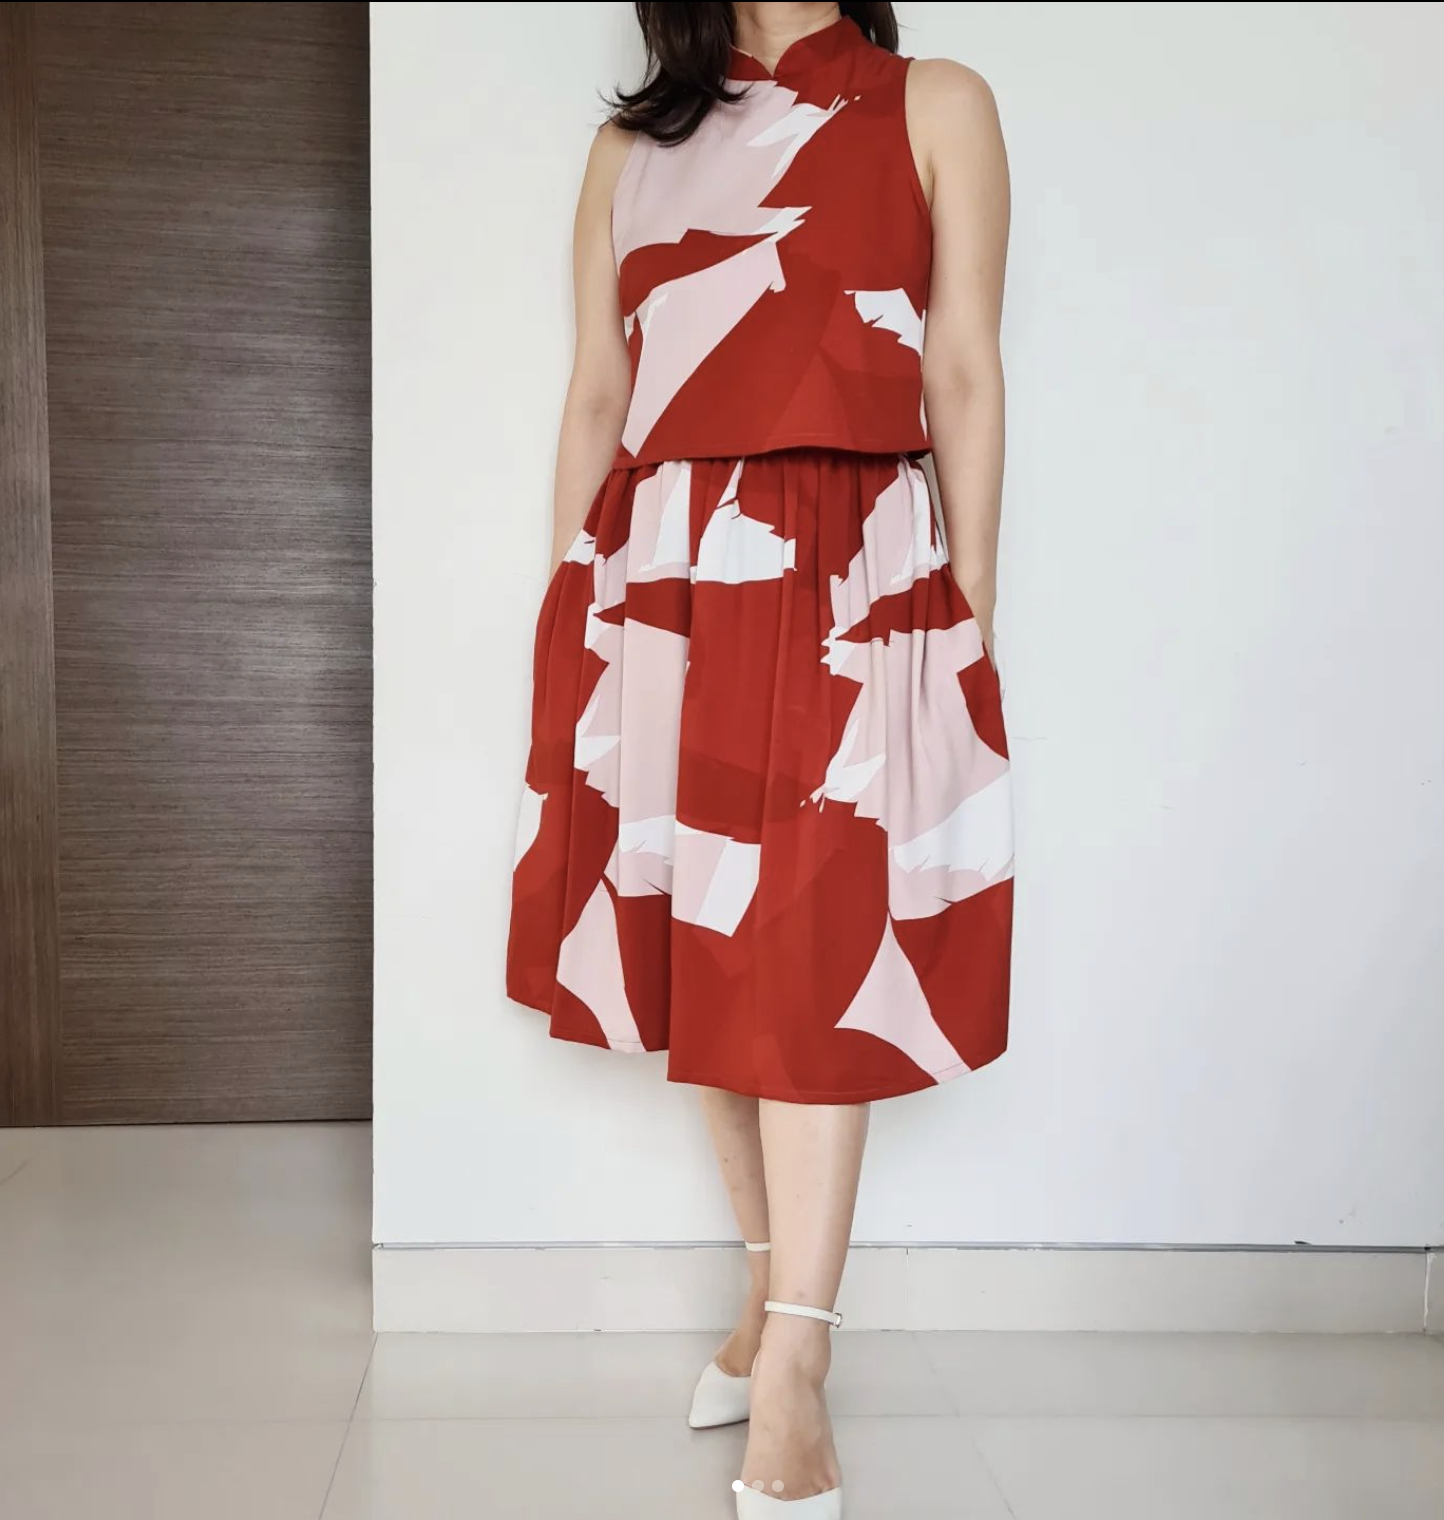
For this year, in the spirit of reducing my cluttered wardrobe with pieces that can only be worn once, I’ve decided make a more versatile and multitasking outfit, by using the same pattern, but hacked into a 2pc set. I’ll wear them both together as a two piece set on the first day of the lunar new year, and I can easily mix and match the top with jeans and the skirt with a plain tee for another day.

Changes at a glance.

Top : I reduced the collars height by 1cm for a more casual look. Made the front piece by cutting on fold from centre front. I wanted it cropped, so I only added 2cm to the waistline mark. Sewed the bust darts but omitted the waist darts for a more boxy look. Created a neck facing piece and inserted a long slit opening on the back, closed with a loop and button. More details down below!

Skirt : I had only 2m of this Mind the maker fabric bought from Sew Good Knits , so the most effective skirt I could make was a gathered skirt with a flat waistband + elastic back for easy feasting. I actually wanted to make culottes but there wasn’t enough fabric. You could follow any skirt pattern you want. I actually used the Simple Skirt from the nani IRO sewing book as a base but I made some changes to the height of the waistband.


Now for the detailed changes to the pattern pieces you will need to recreate the crop top. The pattern pieces are based off the Multisize Ladies Qipao and I will note down where each piece is taken from.

Note that some of the illustrations below were borrowed from my other patterns such as the Qipao Jumpsuit so please read the text carefully before cutting into your fabric!


  1.   COLLAR PIECE
    Adjustments to collar piece (taken off sheet G  – Lined version)

Cut out 2 mirrored pairs of collars, one set outer collar (main fabric) and one set of inner collars (could be main fabric or contrast/coordinating fabric, the choice is yours)

Now sew the collars together, right sides facing. Clip curves and trim seam allowance.

Turn collars right side out and give it a good press. Understitch the inner collars, or you can also do a decorative top stitch from the right side if you want. All up to you.


2. FRONT BODICE
Adjustments to sleeveless tight front bodice on sheet B (only need pattern up to waist line)

Armhole finishing is optional. Original pattern has no seam allowance because we used decorative bias binding. But in the hacked top I made, I used a clean finish binding (see last pic below for what I mean by that)

Next, we need a front facing piece.


3. BACK BODICE
Adjustments to sleeveless tight back bodice (up to waist line only) on sheet C

Back facing piece – this is a little trickier because I will be using a slit opening with a loop and button closure. This is to allow my head to get in and out of the neckline area.

4. PREPARING FACING PIECES.
After making the facing pattern pieces, cut one on fold for each (front and back) on main fabric and interfacing. Apply interfacing, overlock shoulder seams (I think I left this out on the diagram for the front facing) and all around the curves. Mark sewing line on back bodice as shown.

5. MAKE BUTTON LOOP
The following diagram shows you how I make a long piece (borrowed from instructions of Qipao jumpsuit which needed multiple button loops) For this hack you only need one 5cm piece. Cut a strip 2cm x 8cm long. After making the loop trim off the excess to a final length of 5cm. Trust me you will need it.

6. Baste button loop to right side of back bodice (ignore the red dash line for now)

7. Sew front and back bodices together, right sides facing.

8. Baste collars to bodice (starting from front centre)

9. Sew front and back facings together, right sides facing.

10. Align facing pieces around neckline of bodice pieces, pin and sew all around the neckline, make sure all the shoulder seams are open. Clip curves.

11. Sew along red dashed line (essentially 0.5cm from back centre line) around the end of the opening, and up the other side. Cut along the centre back line, stopping at the end of the slit opening, then carefully clip around the curved base.

12. Flip the facings around and give it a good press. Understitch the facing to the collars, top stitch 0.3cm around the slit opening, sew a button on the opposite side corresponding to the button loop.

13. Finish armholes with a clean finish. The measurements below are based on the Qipao jumpsuit pattern, but for the hack I used a 0.7cm seam allowance and a 2.5cm piece of bias of around 55cm for each armhole (you have to measure the armholes front and back to estimate how long a piece you will need)  You can also search up clean finish binding on Youtube if you are unfamiliar with the method. This was covered in the sewing tutorial for the jumpsuit pattern as well.

Sew-along Sewing Tutorials Sewing Videos

Sew Along with A Year of Sewing with Nani Iro – Part 4 of 4

August 27, 2022

And we are at the final stretch! If you haven’t caught up yet, here are the links for previous videos.

Quick Recap of what we covered in the last three weeks
Part 1 (6 Aug) – How to use the book, locating the patterns on the pattern sheet, tracing and adding seam allowances.
Part 2 (13 Aug) – Cutting out the fabric pieces, preparing the pieces for sewing,  and completing steps 1 (front to front yoke) and 2 (make the placket)
Step 3 (20 Aug) – Step 3 (Back to back yoke), Step 4 (Sewing front and back yokes together), Step 5 (Attaching the tie collar)

Today we will complete Step 6 (Finish armholes), Step 7 (Pockets and side seams), Step 8 (Hemming)

Shall we begin?

Very straightforward steps today, just take a little time to get things nice and neat, so don’t skip the tedious steps of marking and pressing especially the hemline!

Some notes on today’s sew

Bias Tape
The materials list called for 1m of single fold bias tape (50cm for each armhole). I did not have the right color in my stash of store bought tapes, and also the weight of the fabric is very different. Most store bought tapes are either cotton or polyester. So I wanted to make my own. However, as I was working with 3m of fabric, I only had a narrow strip to work with. This meant I could not cut strictly on the diagonal of the fabric (i.e.45deg) but I cheated my adjust the angle so that I could fit 2 strips of 50cm in the piece of scrap left. This only works if the edge you are binding is not extremely curved, and luckily for me, the armhole lines are made up of rather gentle curves and for the most part it is a straight line. If you are say binding a round neckline this hack may not work as the bias tape may not be as flexible as one cut on the diagonal. Having said that, If you followed the fabric requirements given by the book (3.9m) you should have no problems cutting on the diagonal since the fabric estimate usually provides for some room for error.

Side Pockets
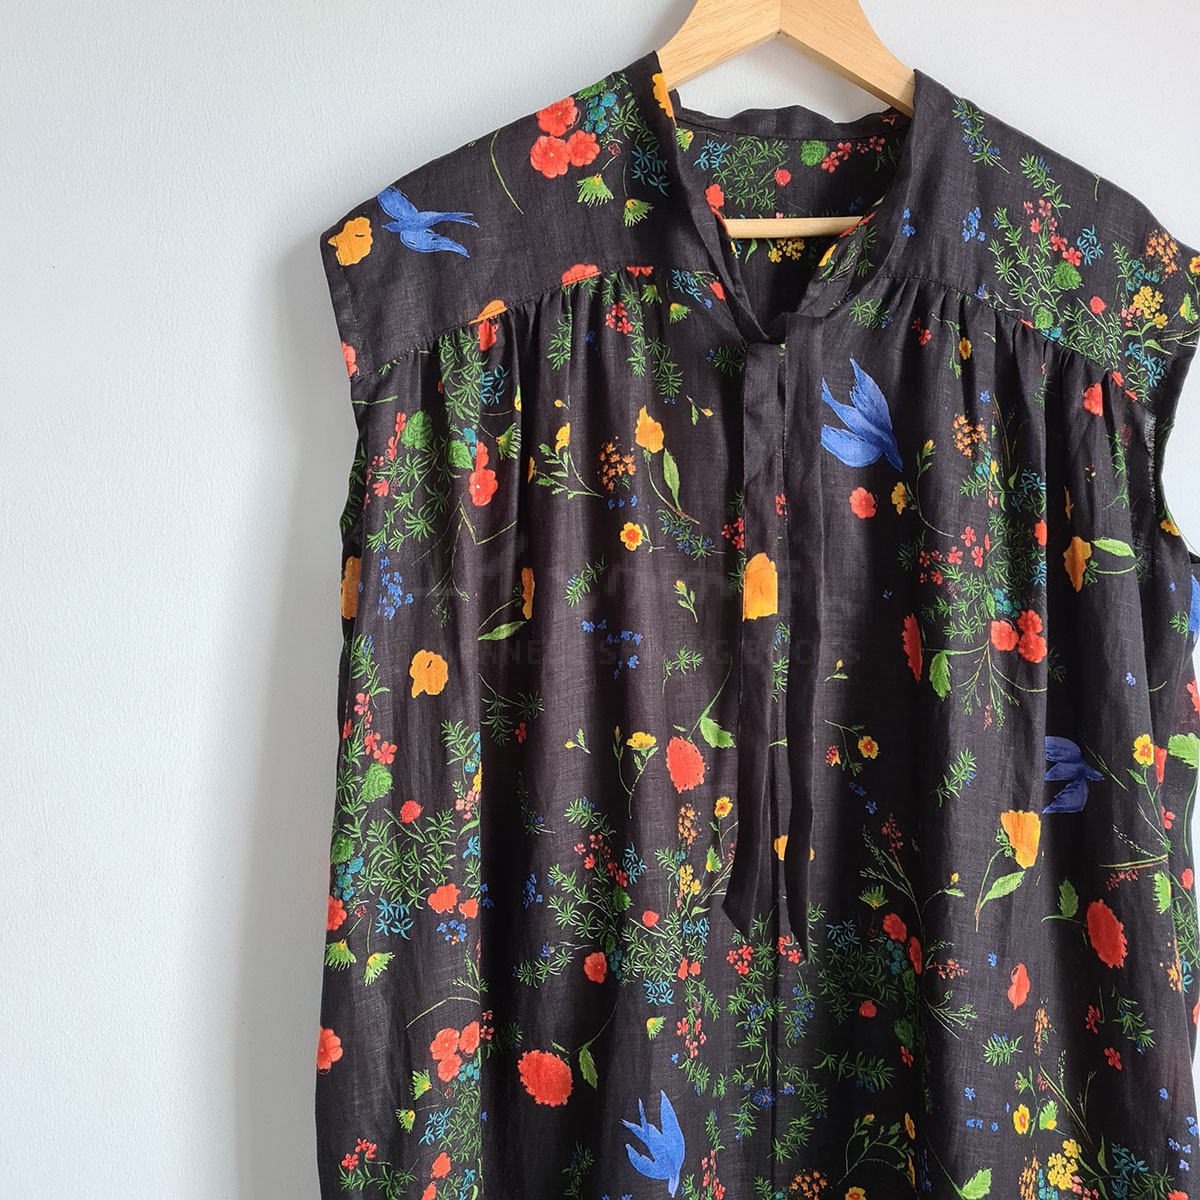
I followed the instructions in the book for making the side pockets, but I did feel there should have been an additional step of understitching the pockets to the side seam to prevent the pocket seams from rolling out and being visible from the outside. A good press should be able to fix that with linen and also because I’m using the same color linen as the outer fabric, it is hardly obvious unless you look really closely. In order to understitch the pockets however, you will need to sew the pocket pieces separately to the front and back of the dress, instead of sewing the pocket pieces together. Feel free to attach the pockets in your favorite methods if you have any, since it doesn’t affect the final look of the dress

List of tools and supplies used in the video  (aff links)

Sewing book – A Year of Sewing with Nani Iro – https://amzn.to/3Jw73Ml
Clover Awl (I can’t find the wooden version online sorry!) – https://amzn.to/3w6UZf9
Leonis Water Erasable Marking Pens. I was surprised when I received these because they were so small but despite it’s size they have outlasted any of the other markers I’ve had and does not dry out. – https://amzn.to/3w6UZf9
Clover Wonder Clips (Mini) good for thin fabrics and smaller crafts as it won’t weight it down – https://amzn.to/3w6UZf9
Clover Wonder Clips (regular) – more sturdy for holding pieces together for example when gathering – https://amzn.to/3bx9GAP
Panasonic cordless iron (it’s a small iron and no cord so it’s perfect for crafting. The shape of the iron also means you don’t have to twist your arm to iron hard to reach places like in between buttons – https://amzn.to/3vICXj8
Olfa Small scissors (super sharp and precise for snipping curves and tiny areas) https://amzn.to/3zzCGzW
Clover Bias Tape Maker – https://amzn.to/3QszLzL 

Credits
This sew-along is brought to you by Zakka Workshop. Zakka Workshop is a publisher of distinctive craft books, patterns, and kits inspired by fresh, contemporary Japanese design. They have lots of interesting craft books so do check them out at ZakkaWorkshop.com!

And that concludes our sew along series! I hope you had fun sewing along and I would really love to see what you’ve made. If you have sewn along with us, you can post it on either FB or IG and tag us @japanesesewingbooks or #naniirosewalong so we can all see your beautiful dresses!

Sew-along Sewing Tutorials Sewing Videos

Sew Along with A Year of Sewing with Nani Iro – Part 3 of 4

August 20, 2022

Quick Recap of what we covered in the last two weeks
Part 1 (6 Aug) – How to use the book, locating the patterns on the pattern sheet, tracing and adding seam allowances.
Part 2 (13 Aug) – Cutting out the fabric pieces, preparing the pieces for sewing,  and completing steps 1 (front to front yoke) and 2 (make the placket)

Today we will complete Step 3 (Back to back yoke), Step 4 (Sewing front and back yokes together), Step 5 (Attaching the tie collar)

and next week we will finish up with 
Part 4 (27 Aug)
– Step 6 (Finish armholes), Step 7 (Pockets and side seams, Step 8 (Hemming)

Today for the back to back yoke pieces, as the length to gather is pretty long so we can’t use the same method for gathering the front sections which were much shorter. I will going to show you how to make gathers the proper way. I believe the book was written for sewists with some sewing experience hence there were no details about how to make the gathers, so just watch the video and I will show you how I do it.

Let’s go!

Some notes about today’s sew-along. Today’s sewing is pretty straightforward just a little tedious since a lot of time is spent on making sure things are neat. Don’t be tempted to rush through the sewing even for the long straight lines like the tie collar. The patience will pay off in neat stitches!

Ironing
When attaching the front and back pieces to the yoke, don’t skip the ironing of the seams because it is very important to help the seams lay flat. For the last step of topstitching you are actually stitching on the reverse side of the fabric and hoping that it will come out nicely on the right side. So pressing the seams open as well as pressing the seam allowance on the inner back yoke is very important to help the double layer yoke lie flat and match up at the seams nicely.

Notches on Tie Collar
The shoulder seams were marked on the pattern pieces and transferred to the tie collar piece before sewing. However, in the video you might have noticed that I marked out the back centre instead of matching the shoulder seams. As the tie collar is a long piece and not a fixed closure, the most important thing is for the lengths of the tie on either side to be balanced. The shoulder seams did match up nicely, but in case yours doesn’t, don’t worry too much about it as long as it is centred to the back.

List of tools and supplies used in the video  (aff links)
Sewing book – A Year of Sewing with Nani Iro – https://amzn.to/3Jw73Ml
Clover Awl (I can’t find the wooden version online sorry!) – https://amzn.to/3w6UZf9
Leonis Water Erasable Marking Pens. I was surprised when I received these because they were so small but despite it’s size they have outlasted any of the other markers I’ve had and does not dry out. – https://amzn.to/3w6UZf9
Clover Wonder Clips (Mini) good for thin fabrics and smaller crafts as it won’t weight it down – https://amzn.to/3w6UZf9
Clover Wonder Clips (regular) – more sturdy for holding pieces together for example when gathering – https://amzn.to/3bx9GAP
Panasonic cordless iron (it’s a small iron and no cord so it’s perfect for crafting. The shape of the iron also means you don’t have to twist your arm to iron hard to reach places like in between buttons – https://amzn.to/3vICXj8
Olfa Small scissors (super sharp and precise for snipping curves and tiny areas) https://amzn.to/3zzCGzW

Credits
This sew-along is brought to you by Zakka Workshop. Zakka Workshop is a publisher of distinctive craft books, patterns, and kits inspired by fresh, contemporary Japanese design. They have lots of interesting craft books so do check them out at ZakkaWorkshop.com!

Sew-along Sewing Tutorials Sewing Videos

Sew Along with A Year of Sewing with Nani Iro – Part 2 of 4

August 13, 2022

Quick Recap of what we covered last week
Part 1 (6 Aug)
 – How to use the book, locating the patterns on the pattern sheet, tracing and adding seam allowances.

Today we will be cutting out the fabric pieces, preparing the pieces for sewing,  and completing steps 1 (front to front yoke) and 2 (making the placket)

The last two weeks we will cover
Part 3 (20 Aug) – Step 3 (Back to back yoke), Step 4 (Sewing front and back yokes together), Step 5 (Attaching the tie collar)
Part 4 (27 Aug) – Step 6 (Finish armholes), Step 7 (Pockets and side seams, Step 8 (Hemming)

Before we begin, let’s talk about pre-washing.

Prewashing 

Do you pre wash your fabric? It depends. For garments I will pre-wash if the final garment is meant to be fitting or if the length of the skirt/dress/pants is crucial. Especially if the substrate is made of natural fibres like cotton or linen that is sure to shrink a little, I will always prewash. Nothing special about the process since you should wash it the same way you would treat your laundry since that’s the way you will wash it after you are done sewing. For me I will serge the raw edges (very important or you will end up with a mess of threads) and also put it in a laundry net. Throw it in the washer and dryer, and always iron it before cutting it out. A crumpled piece of fabric will result in uneven pieces and affect the final outcome.

Having said that, there are times when I do not pre-wash. For example, in this video, the garment is a very loose fitting one. Even the neckline is an adjustable tie collar. So I did not prewash it. Length wise it might shrink a little but for this casual style and such a long dress it may not be very visible so I decided to save time and skip it.

Other than garments, I do not prewash when I’m making bags as well, because I find that certain fabrics especially quilting cottons tend to lose the “shine” and develop a slight worn looking “fuzz” once washed, which ruins the look of the bag. So I never prewash fabrics when making bags.

Ok let’s get started with today’s sew-along video, shall we?

Some notes about today’s sew-along.

Gathering of front yoke
The usual practice when gathering is to divide both the gathered piece, as well as the piece to be attached to, into equal sections so that you can pin them down at equal intervals and get an evenly gathered piece. However as you can see I did not do that in the video. This is because the 2 sections to be gathered are actually quite short so I was able to even out the gathers visually.

Attaching front to front yoke
In the instructions, the front piece is sewn to both the inner and outer yokes in one step by sandwiching the gathers between the inner and outer front yoke. However, as I prefer to adjust the gathers as I sew, I did this in two steps. First by sewing the gathered sections to the outer yoke with slightly less than 1cm seam allowance, then finishing with the inner yoke with a 1cm seam allowance. You can do it either way.

Cutting with Scissors vs Rotary Cutter
If you are cutting fabric with a scissors, it might help to place more fabric weights or even pin your paper pattern pieces to the fabric. I use only two weights because when cutting with a rotary cutter I don’t have to lift the fabric so it doesn’t shift much. The fabric weights are just to keep the piece of paper in place. If you don’t have a rotary cutter / cutting mat, I strongly recommend it, it is a real game changer!

Transferring marks and notches
In the video I transferred all the marks and notches from the paper pattern to the fabric pieces. However some of it might get obscured once we serged the fabrics (especially the side pockets and side seams) so we will mark them again at a later stage. The more important marks and notches are the ones that show you where to gather for the front and back pieces, front and back yoke pieces, and also marking out the seam lines on the placket is important for a neat finish on the placket.

Where to buy (aff links)
Sewing book – A Year of Sewing with Nani Iro – https://amzn.to/3Jw73Ml
Clover curve rulers with seam allowances – https://amzn.to/3oWnHen
Clover long ruler (50cm) – https://amzn.to/3zE5szh
Staedtler 9mm mechanical pencil  – https://amzn.to/3JGkycs
Clover Awl (I can’t find the wooden version online sorry!) – https://amzn.to/3w6UZf9
Leonis Water Erasable Marking Pens. I was surprised when I received these because they were so small but despite it’s size they have outlasted any of the other markers I’ve had and does not dry out. – https://amzn.to/3w6UZf9
Clover Wonder Clips (Mini) good for thin fabrics and smaller crafts as it won’t weight it down – https://amzn.to/3w6UZf9
Clover Wonder Clips (regular) – more sturdy for holding pieces together for example when gathering – https://amzn.to/3bx9GAP
Panasonic cordless iron (it’s a small iron and no cord so it’s perfect for crafting. The shape of the iron also means you don’t have to twist your arm to iron hard to reach places like in between buttons – https://amzn.to/3vICXj8
Olfa Rotary Cutter 28mm – https://amzn.to/3oW8IBg
Olfa 28mm blades – https://amzn.to/3da4VxM
Olfa Small scissors (super sharp and precise for snipping curves and tiny areas) https://amzn.to/3zzCGzW
Olfa Cutting Mat – I join 2 sizes together A1 and A3 to fit on my Ikea cutting table https://amzn.to/3P5rZuy
And that’s it for today! I hope the video wasn’t too fast and the notes were clear enough. See you next week for part 2 where we will start cutting out fabric!

Credits
This sew-along is brought to you by Zakka Workshop. Zakka Workshop is a publisher of distinctive craft books, patterns, and kits inspired by fresh, contemporary Japanese design. They have lots of interesting craft books so do check them out at ZakkaWorkshop.com!

Sew-along Sewing Tutorials Sewing Videos

Sew Along with A Year of Sewing with Nani Iro – Part 1 of 4

August 6, 2022


Welcome to the part 1 of the Sew-along! I’m sure you are as excited as I am! This sew-along is brought to you by Zakka Workshop. Zakka Workshop is a publisher of distinctive craft books, patterns, and kits inspired by fresh, contemporary Japanese design. They have lots of interesting craft books so do check them out at ZakkaWorkshop.com!

The Sew-along will be broken down into the follow sections.  The videos and blog posts will be published every Saturday night at 9pm Singapore time (GMT +8) so be sure to look out for it if you can! No worries if you are unable to sew on Saturday itself because you will have the whole week to catch up. The entire process is divided into easily manageable chunks that you should be able to complete within a week. Here’s a quick summary of what we will be covering.

Part 1 (6 Aug) – How to use the book, locating the patterns on the pattern sheet, tracing and adding seam allowances.
Part 2 (13 Aug) –  Cutting out your fabric pieces, preparing the pieces for sewing, steps 1 (front to front yoke) and 2 (making the placket)
Part 3 (20 Aug) – Step 3 (Back to back yoke), Step 4 (Sewing front and back yokes together), Step 5 (Attaching the tie collar)
Part 4 (27 Aug) – Step 6 (Finish armholes), Step 7 (Pockets and side seams, Step 8 (Hemming)

Without further ado, here is today’s sew-along video

Some notes about today’s sew-along and for fabric / materials purchase.

Dress length adjustments
I traced the patterns as-is and did not make any adjustments. I am 160cm tall and the dress is 123cm long. The dress ends at the ankle for me which is perfect. To adjust the length if you are shorter/taller than me, you can adjust the length by varying the width of the hem than the 7cm hem as instructed, or just add/substract directly from the bottom edge of the pattern to your desired length since the side seams of the front and back pieces are straight lines from armhole to hem.

Fabric requirements
I know we didn’t cut any fabric in this video, but since many of you might need to order fabric for this project, I thought I should mention that I actually used a 3m cut of fabric even though the instructions asked for 3.9m. I realized that for M size, even with the standard width of 110cm (or was it 104cm?) I was actually able to fit the yokes side by side, and the pockets were also cut in a row instead of staggered like in the pattern layout diagram. I also saved on some fabric by cutting the tie collar along the long scraps left from cutting the front and back pieces. I’m not sure if this will apply for sizes larger than M though, plus I’m short, so it’s best you finish today’s video and with the actual pattern pieces (including length adjustments if any), you can test out the placement on your fabrics before deciding how much fabric you might actually need.

Bias Tape requirements
The materials list states 1m of 1.2cm wide single fold bias tape. This was not included in the pattern layout so I am assuming they mean store bought tape. This is for finishing the armholes. You can use store bought tape of course, but because I was using thin linen, and I didn’t like the difference in weight of cotton bias tape vs thin linen, so I decided to make my own.  As the bias tapes will not be seen from the outside, you can use any fabric strips of similar weight and color for bias tape. If you want to make them using the exact same fabric as the dress, then please use the recommended fabric required as that will safely allow you to cut extra for bias tape. I only manage to squeeze it out of 3m by not cutting it at 45deg. It’s unorthodox but it worked because the armholes for this dress is not extremely curved and is for the most part, straight lines so I managed to get away with it. But it’s entirely up to you if you want to do the same, and this is based on M size so the scraps I had left could accommodate this.

Where to buy (aff links)
A Year of Sewing with Nani Iro – https://amzn.to/3Jw73Ml
Clover curve rulers with seam allowances https://amzn.to/3oWnHen
Clover long ruler (50cm) https://amzn.to/3zE5szh
Staedtler 9mm mechanical pencil  https://amzn.to/3JGkycs
The tracing paper I use is from Taobao so it’s probably not useful to link it here but there are lots of options on amazon and online for rolls of tracing paper.

And that’s it for today! I hope the video wasn’t too fast and the notes were clear enough. See you next week for part 2 where we will start cutting out fabric!