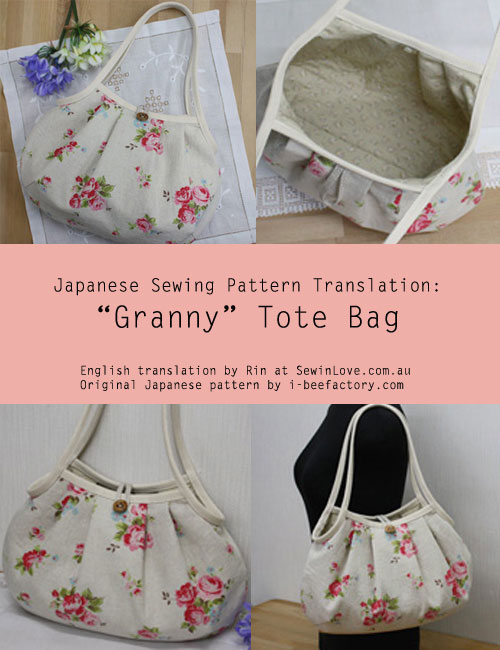
Today’s blog post is a guest post by Rin Gomura of Sew in Love. Rin is my very first guest blogger! I can’t remember how long ago it was when I started following her on twitter, and subsequently discovering her lovely blog, but I can tell you I was pretty excited when she emailed me and asked if she could share this wonderful translation with you guys. Remember this free pattern link I posted last February about Bee Factory? Rin helped to do a English translation for the “Granny” tote bag and is kindly sharing it with us. Do check out the other free patterns at Bee Factory as well as Rin’s blog Sew in Love. Which by the way, is having an exciting magazine giveaway! Read on….

Hello, my name is Rin from the blog, Sew in Love. I am visiting Japanese Sewing Books today to share this Japanese sewing pattern translation for a cute, floral tote bag. This style of bag is called a “Granny” bag in Japan. The term applies to rounded bags which have gathering and pleats.
About Rin
I’m a half Japanese girl from Australia, now living in San Francisco. I like to sew clothes, knit, and dabble in all things handmade. It would be wonderful if you could visit my blog, Sew in Love for your chance to win a brand new copy of the super-cool Japanese sewing pattern mag, FEMALE.
Let’s get started!
Finished measurements: 36cm (w) x 27cm (d)
Please download the original, real-size sewing pattern (PDF) from the Japanese website, Bee Factory.
What you will need
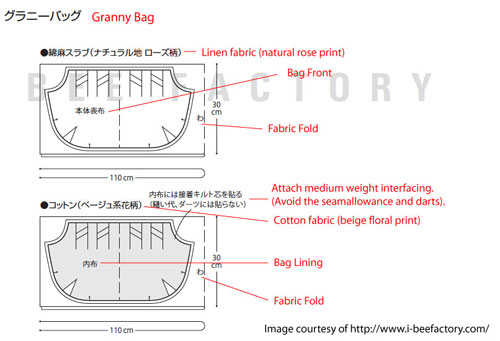
- Linen fabric (natural rose print) – 30cm x 110cm
- Cotton fabric (beige floral print) – 30cm x 110cm
- Cotton fabric tape for bag handle – 2.5cm x 174cm
- Cotton lace tape – 1.5cm x 6cm
- Rope for button loop – 17cm
- Buttons – plastic x 1, wooden x 1
Instructions
The following are English translations for the steps and corresponding photos on Bee Factory. This bag is super easy, especially if you follow along to the detailed photos with these English instructions!
- Ensure you have the step-by-step photos open. Print out the real-size sewing patternfrom Bee Factory. Cut out the three pattern sections, and glue them together by matching のりしろ(1) with のりしろ(1) and のりしろ(2) with のりしろ(2).Add 1cm seam allowance all around and cut out two pieces for the Bag Front and two pieces for the Bag Lining.
- Attach interfacing (medium weight) to the two Bag Lining pieces. Avoid the triangular darts areas and the seam allowance.

- Fold in the darts of the darts of the Bag Front fabrics and stitch into place.
- Press down the darts outwards. With right sides facing, stitch the Bag Front pieces together along the 1cm seam allowance.
- Similarly, make the darts on the Bag Lining and stitch the two Bag Lining pieces together. Press the seam allowance outwards.
- Insert the Bag Lining inside the Bag Front. Fold down the pleats and stitch the Bag Lining and Front together 5mm from the edge.
- Cut the fabric tape into three pieces; 22cm x 2 and 130cm x 1.
- Join the ends of the 130cm fabric tape to make a loop for the bag handle. Zig zag stitch the edges together twice (red line and green line).
- Cover the zig zag stitching by wrapping the cotton lace around the fabric tape. Hand stitch lace into place.
- Fold the bag handle in half at 5cm from the centre of the cotton lace. Mark the two spots on the handle where the fold is made.
- Place the rope for the button loop at the centre of the Bag Front. Attach the 22cm fabric tape pieces along the bag opening. Fold the tape in half and stitch into place. Trip excess tape.
- Pin the bag handle onto the bag so that the two marks made in Step 10 line up with the bag’s side seams. Fold the bag handle fabric tape in half and stitch all the way along the handle.
- Attach the buttons 1cm below the fabric tape on the opposite side to the button loop. Attaching two buttons on both sides of the fabric makes a stronger closure.
- Close the bag by placing the button loop around the outer button. Finished!
For more sewing tutorials and fun, crafty inspiration, please come and say hi at Sew in Love. Don’t forget to enter to win a FREE copy of the Japanese sewing pattern magazine, FEMALE.
Thanks for having me here at Japanese Sewing Books!
Love,
Rin


11 Comments
Love, love, love this tutorial. Thank you so much for sharing it. x
that bag is so cute! thak you so much for sharing the pattern!
[…] This bag may be called ‘Granny’, but it’s far from old looking in my opinion! […]
[…] Today, I am guest blogging at the blog, Japanese Sewing Books. Please check out my article on a free tote bag sewing pattern and tutorial. I have translated a Japanese sewing pattern for a cute tote bag called, a “granny” bag […]
[…] is nothing “Granny”-ish about this “Granny tote bag” – it’s simply […]
I have made this exact same bag twice from the original and just wung it! They turned out different from the original but I like them, they are now ‘my version’
[…] Get the Translation […]
There is no credit for the actuall designer. It is introduced as if the pattern was written by Rin. Wondering if she ever asked the designer’s permission.
It’s so cute. If i had the skills to make it , I would love to do it.
Thank you for the tutorial.
I apologise in advance for the spelling mistakes
We’ve featured this post and love that you’ve offered it free to everyone thank you!!!!
I’m going to try this. Will be first time sewing in many years. Wish me luck.